How To Make a Terrarium with Local Plants: (Helpfull illustrated Guide)
Making a terrarium for your home is quite easy. Once you have collected a few plants from outside and gathered some basic materials you’ll be ready to put it all together. Building terrariums is a fun craft that you can share with your friends and family while you watch it change and grow together throughout each season.

There are some basic materials you will need to set up your native plant terrarium. You can find these items at nurseries, and aquarium shops. I live in downtown Victoria BC, and was able to find most of the plants and moss seen above in sidewalk cracks and in unused flower beds.
Materials You Will Need:
- Terrarium. Any glass, sealed container will work, for instance: an old fish tank or a large glass jar.
- Pebbles/Gravel. Acquire these outdoors, aquarium gravel also works well. Be sure to to rinse thoroughly.
- Potting Soil. See below for my recipe for terrarium soil for best results.
- Plants. These can be purchased from your local nursery, or you can collect these from outdoors.
- Charcoal. This is for keeping your soil clean. (Optional)
- Plastic Mesh. Window screen works best, this layer separates your soil from the pebbles.
- Long Tweezers. These are helpful for planting hard to reach places where hands don’t fit.
- Spray Bottle. Any cheap, spray bottle will work.
How to Collect Local Plants for your Terrarium:
Deciding on the type of terrarium you are going to build is an important step which will play an part in the success of your terrarium. Choosing where your terrarium will live in your house first is a good way to decide what type of plants you should be collecting. Make sure you pick plants that generally enjoy the same living conditions as one another. For instance, if you choose to build a tropical plant terrarium, then the plants you collect will require moderate sunlight, and at least 50% humidity. However, if you are planning to build a terrarium with local succulents, then your plants will require much less water and will require a bright sunny spot in your house with some ventilation.
- Go for a walk on a local nature trail or through the city to scout possible locations for suitable plants.
- Use your fingers or a small shovel to remove small plants (including the roots) and put them into separate zip-lock bags.
- Spray plants with water to keep them moist on their journey back to their new home.
- Moss is a great way to retain moisture in a terrarium. Be sure to grab a few small pieces you can use as ground cover in your terrarium.
- Rocks, bark, and sticks are a nice feature to add to your terrariums. Be on the lookout for interesting specimens!
- Some of the most interesting plants can be found in the cracks of the sidewalk, at bus stops, or on the top of a mountain – it’s up to you to find your favorites.
- Never remove plants from your neighbors yards, this could get you into trouble.
- Rinse off your newly collected plants with cool water as soon you get home and be sure to remove and dirt, mold, and pests. Forgetting this step could cause problems down the road for your terrarium.
Once you have collected 5-10 interesting plants you’ll be ready to start constructing your native plant terrarium.
Step 1 – Prepare your Terrarium
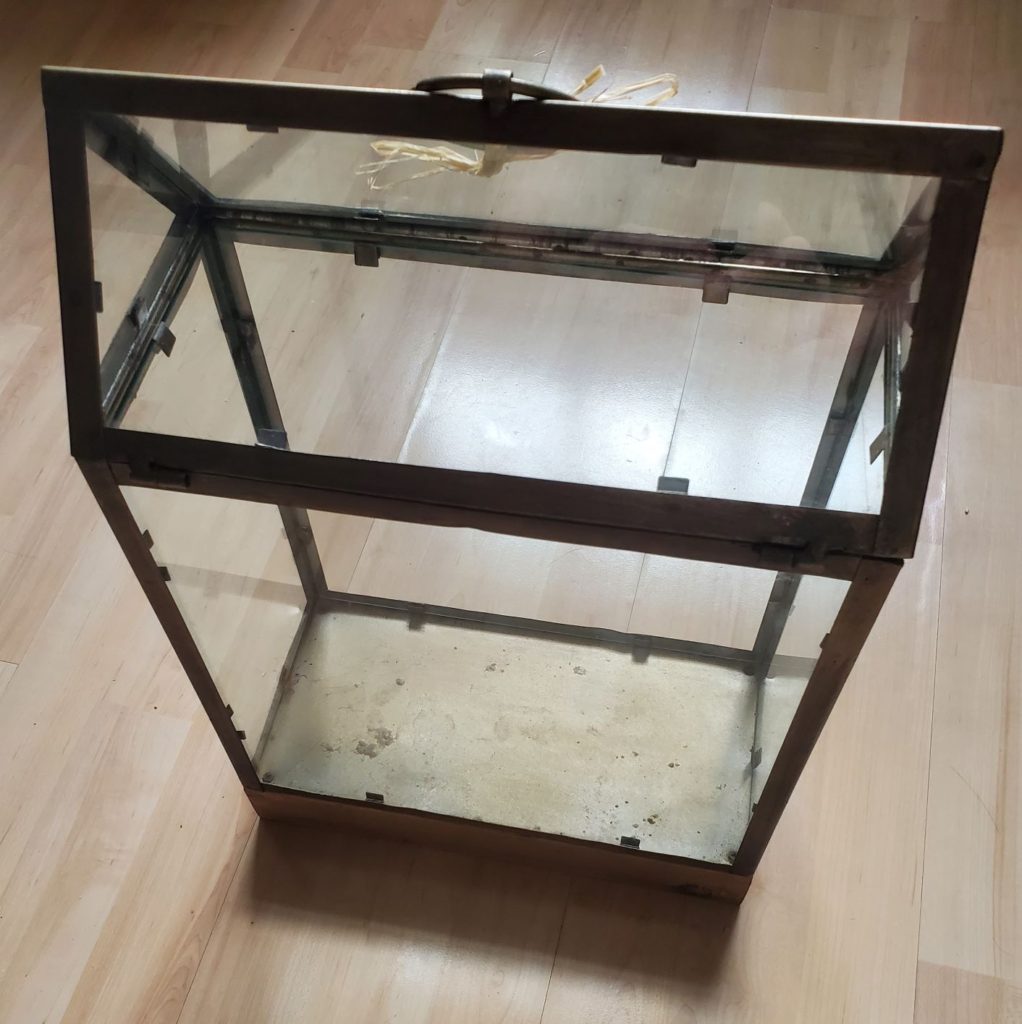
- Clean thoroughly. Wipe away dirt or debris from the inside with a damp paper towel.
- Seal holes. Use waterproof sealant around the bottom edge and fill gaps to prevent water leakage.
- Wipe Glass. Avoid harsh chemicals as this could harm your plants. Dish soap and warm water works best.
- Protect Flooring. Place an old towel or tarp beneath your terrarium to protect your floor or carpet. I spilled soil and gravel on mine and sincerely regret not using one.
Step 2 – Add a layer of Pebbles
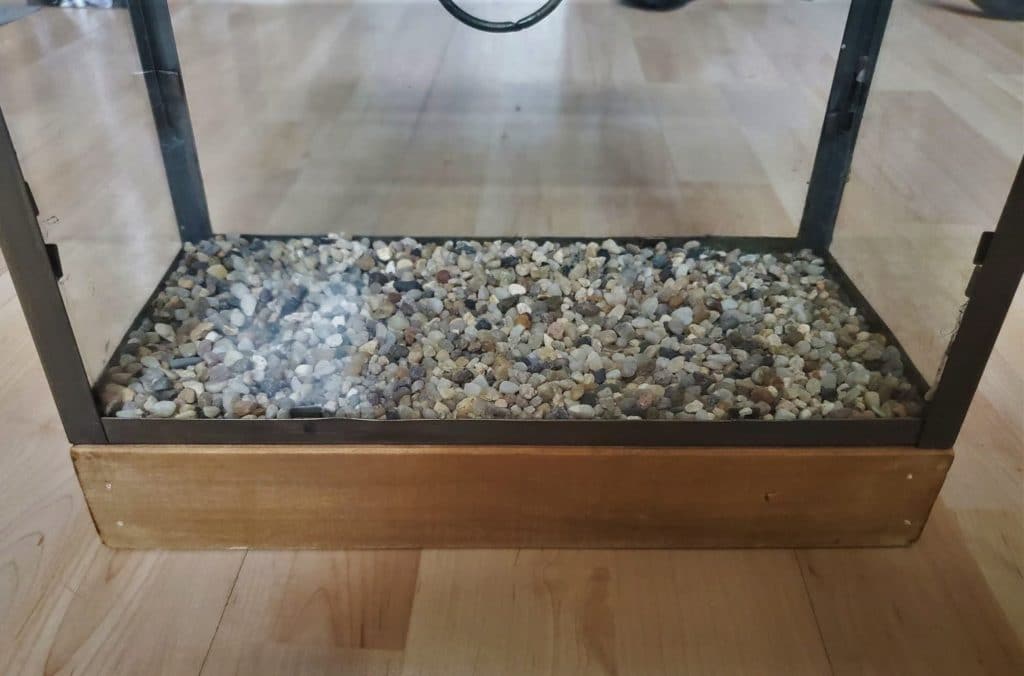
Place 1/4-1/2 inch of washed pebbles as the first layer of your terrarium. The purpose of this layer is to catch excess water that passes through your soil. Also, it will help prevent the water sitting in the soil causing decay and rot which is harmful to plants. The water caught here will eventually evaporate and condensate on the glass which will perpetuate your terrarium’s mini water-cycle.
Step 3 – Place Mesh Screen on Top of Pebbles
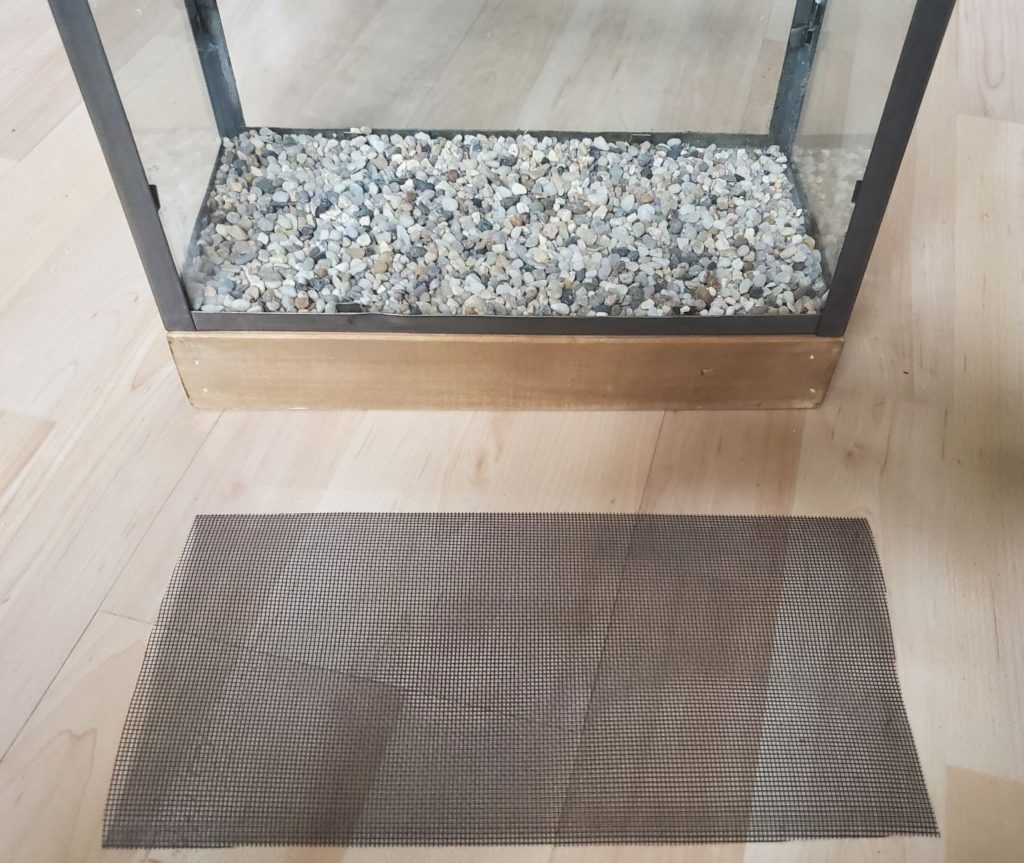
Cut a piece of mesh to fit overtop of your first layer of pebbles. A little bit of overhang is perfect for keeping the two layers separate. Window screen is inexpensive, durable, and can be found at most hardware stores. Press it down firmly on top of the rocks to keep it in place.
Step 4 – Add a Layer of Charcoal
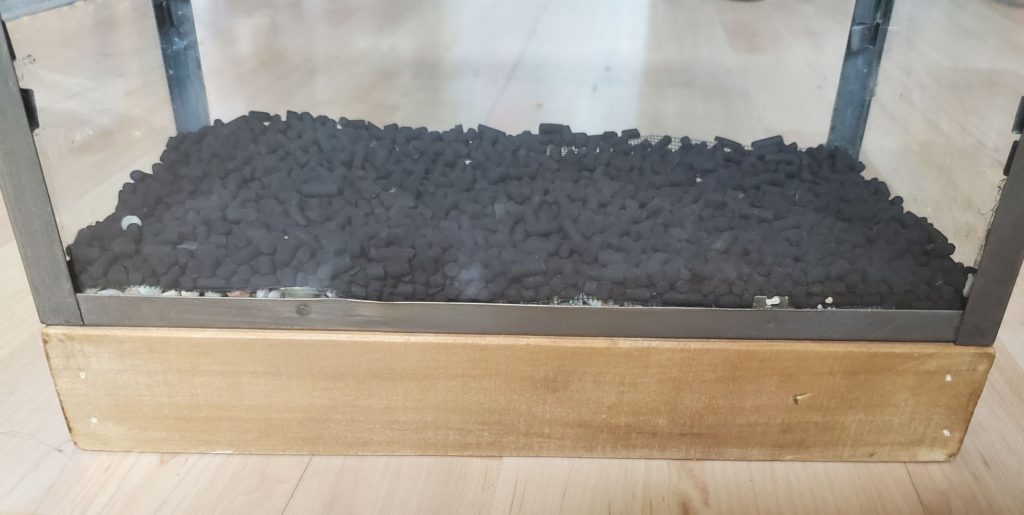
Pour a thin layer of activated charcoal on top of the mesh layer. This layer will help keep your terrarium clean by removing toxins from the soil that can harm your plants over time and will also keep it smelling fresh. Spread the charcoal evenly with your hands across the bottom. You may want to use gloves for this step as the charcoal can be extremely dirty and will leave your hands and anything it touches black.
Step 5 – Add a Layer of Soil
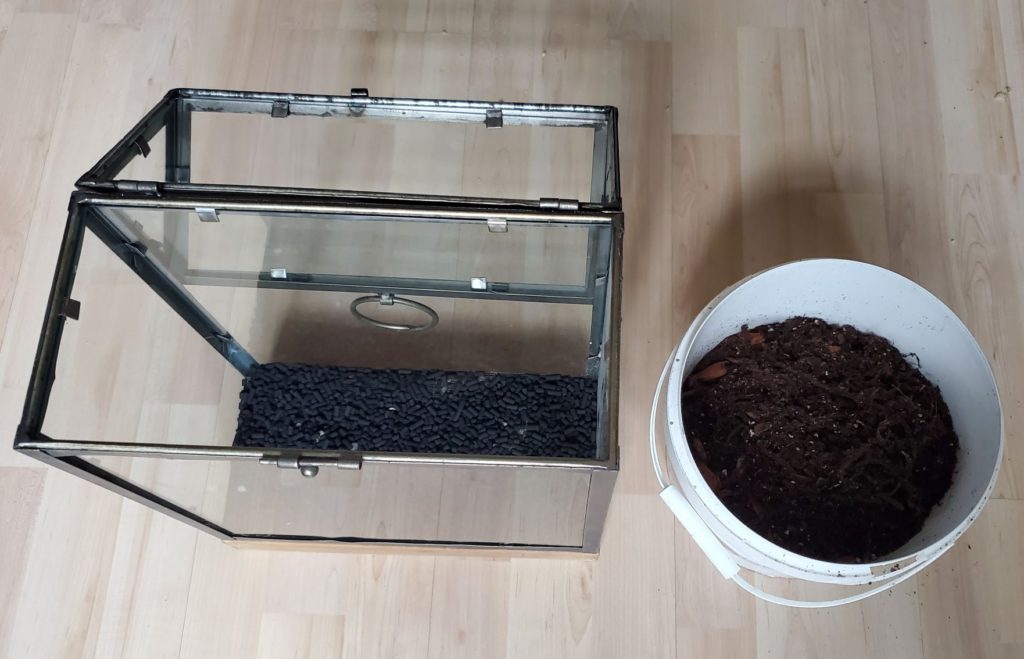
Pour your soil over your layer of activated charcoal. The soil will be your thickest layer. Add the soil liberally, you’ll want at least several inches of loose soil across the bottom. Keep the soil loose, soon you’ll be inserting your plants in this layer so there is no need to press it down quite yet.
Here is the Best Soil Mixture to use for Tropical Terrariums:
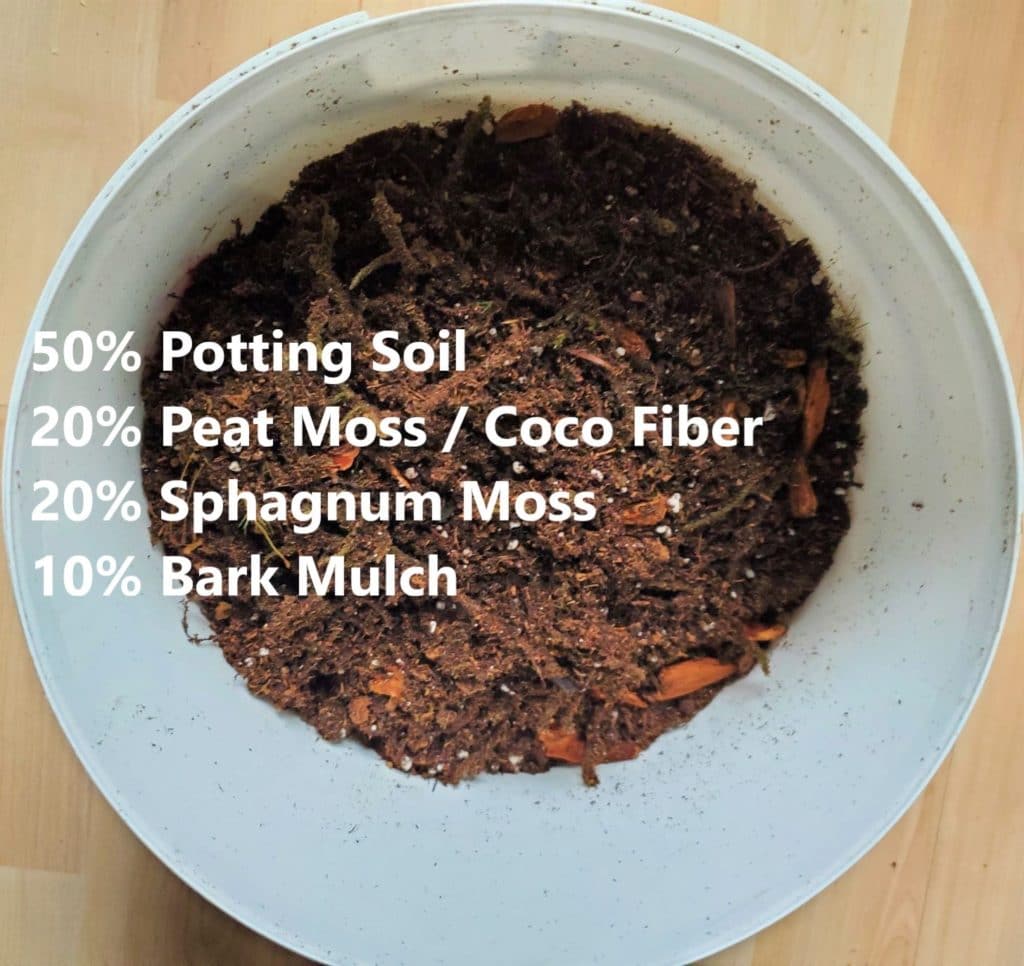
I’ve found that the following mixture ratio work best for tropical plant terrariums:
- 50% Potting Soil
- 20% Peat Moss or Coco Fiber
- 20% Sphagnum Moss
- 10% Bark Mulch
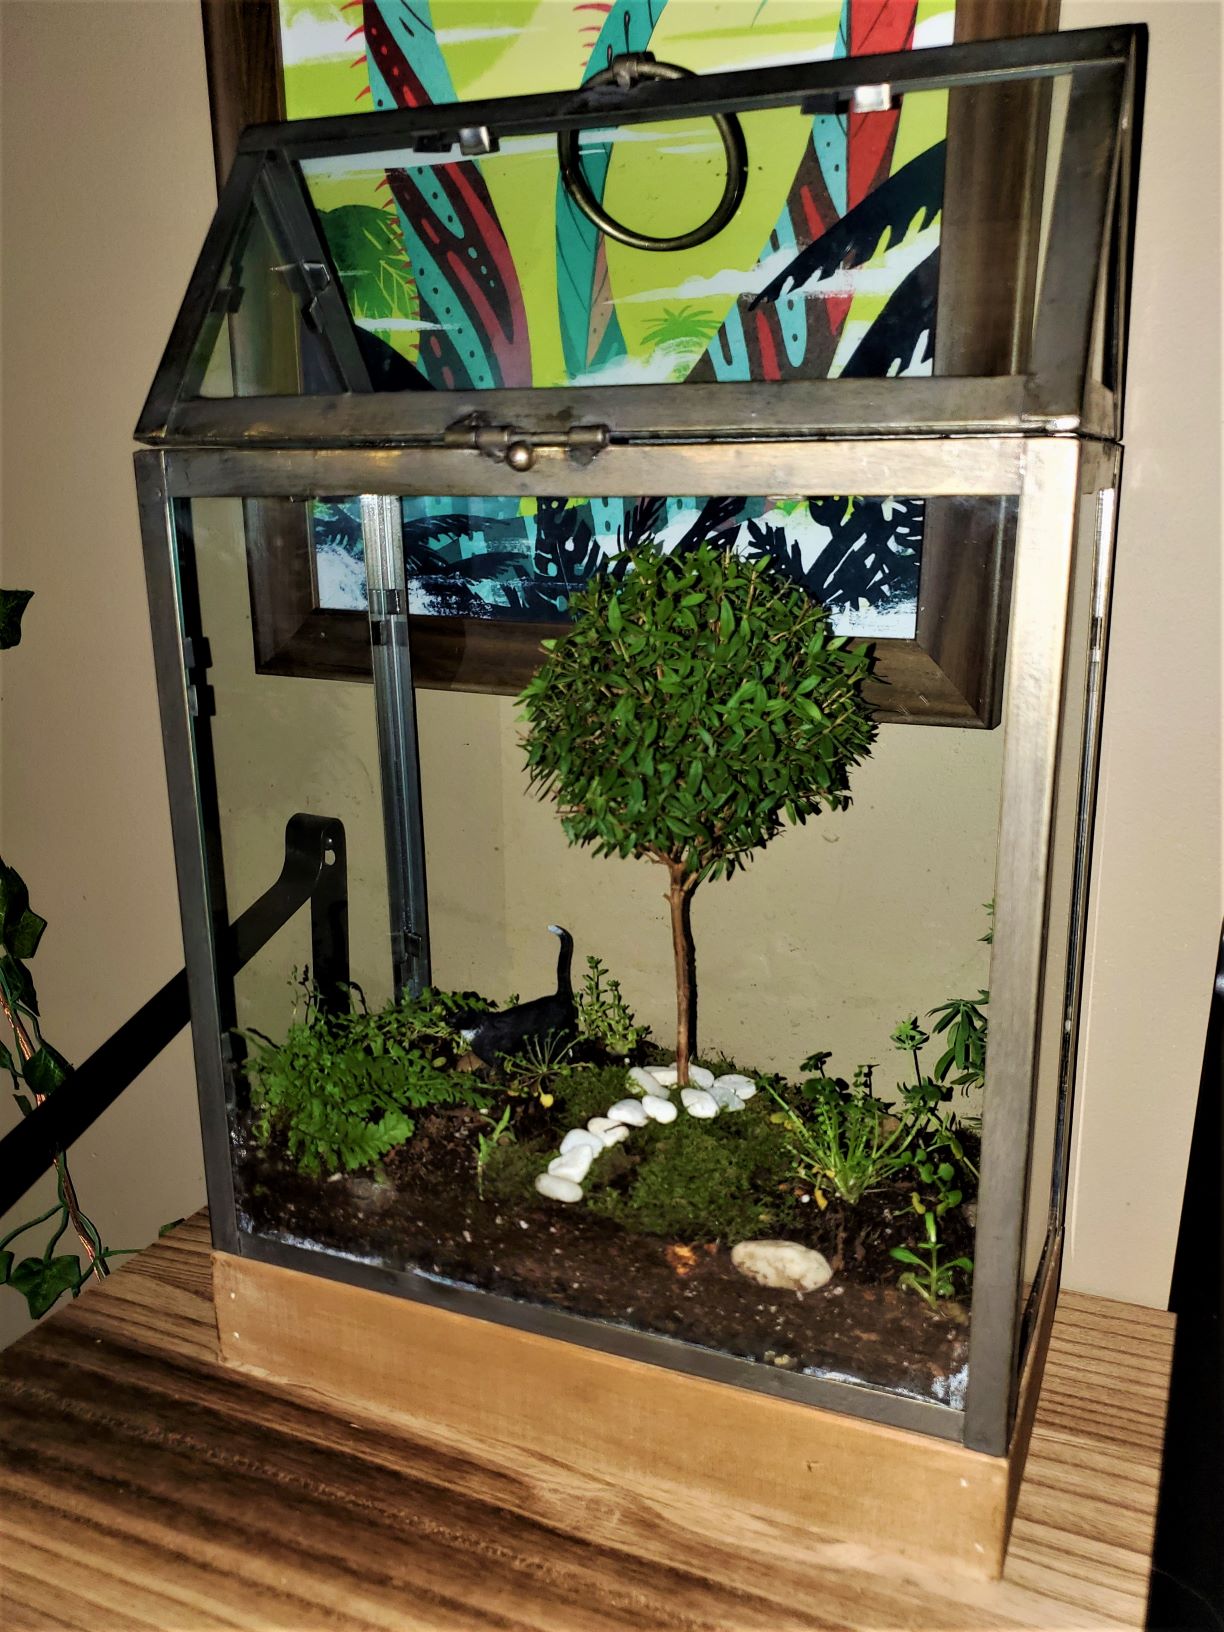
Step 6 – Add a Layer of Plants
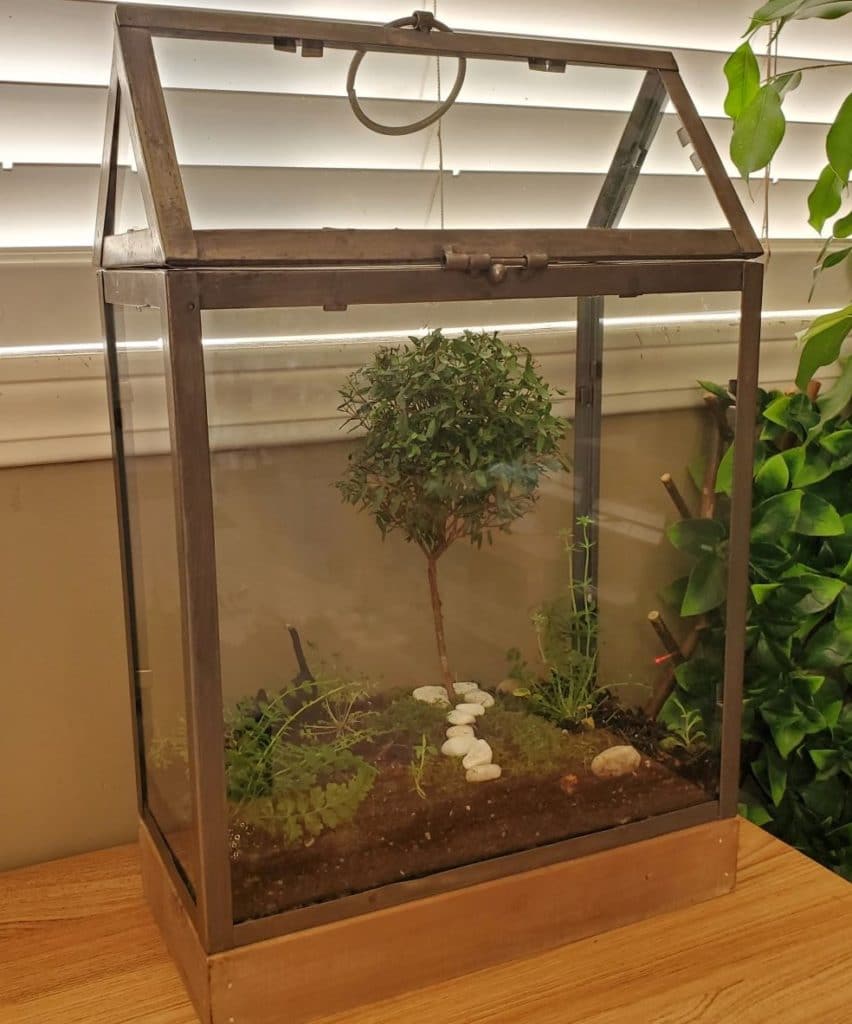
- Carefully insert each plant into its own special spot in your new terrarium.
- Make sure the roots are still intact and are sufficiently buried into your soil mixture.
- Press the soil down around each plant to keep it in place. They should be able to stand up on their own.
- Prune your plants if necessary to give each of them enough room to grow in their new home.
- Use a set of long handled tweezers to reach into tight spots if your hands don’t quite fit.
- Add your accent features like rocks, sticks or figurines to help bring your mini nature scene to life.
- Water your finished terrarium thoroughly, you may need to wipe down the edges if any soil or water has collected. A clean, clear window will make your terrariums look extra realistic.
Tropical Terrarium Care and Tips:
- Check the moisture levels every few days. Spray using a water bottle.
- Use distilled or rain water if possible. Tap water may contain chlorine and other harmful substances which can sometimes be harmful to sensitive plants and will get trapped inside your terrarium.
- Condensation on the walls of your terrarium in the evenings is normal and a good sign – this shows the water cycle your created is working properly.
- Seeing condensation all day could indicate that you have too much water trapped inside your terrarium. Place a dry paper towel inside to allow it so soak up additional moisture.
- Remove dead/dying plants immediately from your terrariums.
- Remove mold/fungus. Leaving this to grow unchecked will harm your plants.
- Adjust the placement in your home if your terrarium is getting too hot as this can cause your plants leaves to brown.
- Replace any plants that are not growing well or are starting to die. Part of the fun of terrariums is learning what works and what doesn’t!
Here is the Best Humidity Level Needed for a Closed Tropical Terrarium:
50-70%. Use a hygrometer to properly measure humidity levels in your home, or place it directly inside your terrarium for a more accurate reading.